In this blog
TL;DR
USPS Shipping Labels are the barcoded labels that tell USPS where a package is going, what service it is using, how much postage has been paid, and how the package should move through the network. You can create them online through USPS Click-N-Ship, print them at home, get them printed at a Post Office with Label Broker, or have a clerk create them for you in person.
What You Need to Know About USPS Shipping Labels Before You Start
-
You can create USPS shipping labels online with Click-N-Ship or at a USPS retail location.
-
USPS Label Broker lets you get a label printed without owning a printer.
-
The most common print format is a 4 x 6 inch label, but standard paper works too.
-
Incorrect addresses, wrong package details, and poor barcode placement are the mistakes that cause the most trouble.
This guide walks through the full process, explains the main label types, shows how to print them properly, and highlights the mistakes that cause delays or package rejections.
Why USPS Shipping Labels Matter for Small Business and Ecommerce Sellers in 2026
A USPS shipping label looks simple, but it does a lot of work. It carries the mailing class, sender and recipient addresses, postage, tracking data, and the USPS barcode used to move a package through its network. Get the label right, and the shipment usually moves cleanly. Get it wrong, and even a small mistake can turn into a delay, a return, or a postage adjustment.
That is why understanding how USPS shipping labels work is not just useful for frequent shippers. It matters to anyone who wants a package to move without friction. For businesses managing ecommerce fulfillment at scale, proper label creation becomes a crucial part of the broader shipping for small business operations. Businesses that also rely on ecommerce logistics platforms to manage multi-carrier workflows find that label accuracy has downstream effects on every stage of the delivery process.
Sources: | |
What Is a USPS Shipping Label and What Information Does It Include?
A USPS shipping label is the official label that allows USPS to accept, route, track, and deliver a package. It includes the sender and recipient addresses, the selected mailing service, the postage paid, a tracking number for eligible services, and a scannable barcode that USPS uses throughout the package's journey.
It is not the same as a receipt, nor is it the same as a customs form, although international labels may include customs information as part of the label workflow. Understanding the distinction between shipping labels and packing slips is essential for proper documentation. It also helps to understand how to create a shipping label correctly the first time to avoid package rejections or routing errors.
The shipping label is what gets the parcel into the USPS system. Once it is attached to the outside of the box or envelope and scanned into the mail stream, USPS can process the shipment according to the service you purchased, whether that is USPS Ground Advantage, Priority Mail, Priority Mail Express, or an international service.
Types of USPS Shipping Labels Explained: Ground Advantage, Priority Mail, Flat Rate, and More
USPS shipping labels are not all the same. The right label depends on where the package is going, how fast it needs to get there, how much it weighs, and whether it qualifies for a special service. In 2026, the most important current package services are Ground Advantage, Priority Mail, Priority Mail Express, Media Mail, Flat Rate, and international shipping labels.
What Is USPS Ground Advantage and When Should You Use It for Domestic Packages?
A USPS Ground Advantage label is used for domestic packages up to 70 pounds that are expected in 2 to 5 business days. It is the basic everyday parcel label for many low-cost domestic shipments and is often the starting point for small ecommerce packages and routine consumer shipments. USPS Ground Advantage replaced First-Class Package Service and Parcel Select Ground as the primary economical shipping option. For shipments where speed is less critical, it is often compared against ground shipping options from other carriers to find the best rate.
How to Use USPS Priority Mail Labels for 2–3 Day Domestic Delivery
A Priority Mail label is used for domestic deliveries that usually arrive in 2 to 3 days. Priority Mail includes tracking and insurance, and it is one of the most commonly used USPS shipping labels for packages that need a balance between speed and cost. Many businesses rely on Priority Mail for 2-day shipping ecommerce fulfillment. For a deeper look at how it compares to faster USPS options, the USPS Priority Mail vs Priority Mail Express breakdown explains the key differences in cost and transit time.
When to Choose Priority Mail Express for Overnight or Next-Day USPS Shipping
A Priority Mail Express label is for USPS's fastest domestic shipping service. USPS says it delivers in 1 to 3 days, often with a money-back guarantee, and it is the label type to use when timing matters more than saving a few dollars. USPS Priority Mail Express rates and USPS overnight shipping options make it competitive with private carriers for urgent deliveries.
Media Mail Labels: The Cheapest USPS Option for Shipping Books and Educational Materials
A Media Mail label is for eligible educational and media items such as books and recorded media. It is one of the cheapest USPS shipping label options, but it has strict content rules, so it should only be used when the contents actually qualify.
USPS Flat Rate Labels and Packaging: How Fixed-Price Shipping Works
A USPS Flat Rate label is tied to USPS-provided Flat Rate packaging. For qualifying Flat Rate envelopes and boxes, you pay a single fixed rate within the weight limits, instead of calculating postage by zone and weight the usual way. Understanding flat-rate shipping versus standard weight-based pricing helps you choose the most economical option. It is also worth comparing against standard shipping rates to determine which approach saves more money for your typical package sizes.
How to Create International USPS Shipping Labels and Customs Forms Online
An international USPS shipping label is used when a package is going abroad. USPS says Click-N-Ship lets you print international labels and customs forms together, making it the standard workflow for creating international packages from home or the office. Businesses handling shipping from India to USA or other cross-border routes need to understand customs documentation requirements. Those managing international logistics at scale should also account for carrier differences in rates and transit times when selecting the right service for each destination.
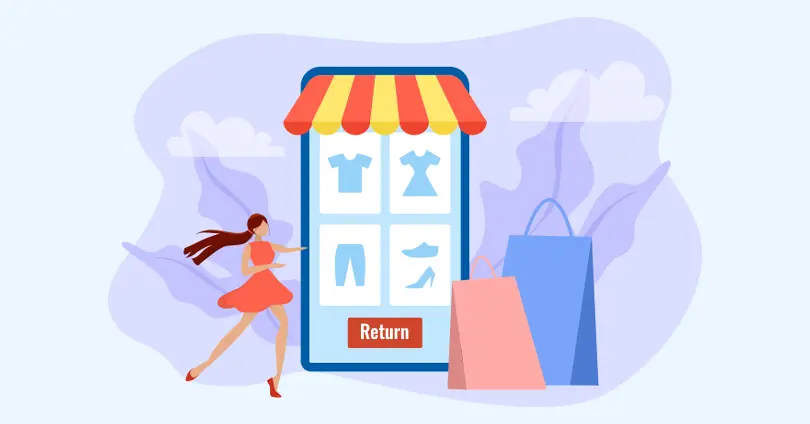
How to Set Up USPS Return Shipping Labels for Ecommerce Returns
A return shipping label is a USPS label created so that a recipient can send an item back. USPS Click-N-Ship supports return labels, making them useful for businesses handling exchanges, returns, or reverse logistics without having to create a new shipment from scratch each time. Proper return labels are essential for efficient reverse logistics operations and help reduce friction in the overall ecommerce returns process.
What You Need Before Creating a USPS Shipping Label Online
Before you create USPS shipping labels, it helps to have the basics ready. The process itself is not hard, but it goes much faster when you already know the service you want, the package details, and how you plan to print or receive the label.
- A USPS account login: Click-N-Ship requires a USPS.com account, which also gives you access to shipping history, refunds, and saved label information.
- The recipient's full address: You need the full deliverable address, including ZIP Code. For international shipments, you also need the destination country and customs details.
- The package weight and dimensions: USPS asks for weight and, for many shipments, package dimensions. Those details affect price, service eligibility, and whether the package qualifies for certain options.
- Your return address: The sender address is on the label and is important for routing, returns, and refund handling.
- A payment method: You need a credit or debit card or another supported payment method to buy postage online.
- Packaging supplies: A sturdy box or envelope, tape, and protective material matter because the label only works well if the package itself is properly packed and sealed.
- A printer or a no-printer alternative: You can print at home, use Label Broker at a USPS location, or request Label Delivery Service if you do not want to print yourself.
Once you have these details ready, the label-creation process is usually quick. Most problems occur when people guess the weight, rush the address, or wait until checkout to figure out how to actually print the label. Proper preparation is key to avoiding shipping delays and ensuring smooth package acceptance. Sellers who regularly ship a package for the first time benefit from reviewing the complete process before purchasing postage.
Sources: | |
How to Create a USPS Shipping Label Online Step-by-Step Using Click-N-Ship
Creating a USPS shipping label is now a fairly straightforward process. The two most common ways are online through USPS Click-N-Ship and in person at a USPS location. The online route is usually faster and gives you access to commercial pricing, while the in-person route works well if you want help or do not want to handle printing yourself.
How to Create USPS Shipping Labels Online Using Click-N-Ship
Click-N-Ship is USPS's official online label-creation tool. It is built for people who want to create labels at home or at the office, pay online, print labels, and drop off packages or schedule a pickup. USPS also says Click-N-Ship gives access to lower Commercial Rates for shipping labels.
Step-by-Step Process for Creating Labels with USPS Click-N-Ship
-
Log in to your USPS.com account or create one if you do not already have one.
-
Open Click-N-Ship and start a new label.
-
Enter the sender and recipient addresses carefully. USPS uses this information to determine eligibility, routing, rates, and in some cases, available delivery options.
-
Choose the package type and enter the package weight and dimensions. For some package types, you may also need to enter girth or special characteristics.
-
Review the service options USPS shows you, such as Ground Advantage, Priority Mail, or Priority Mail Express. Click-N-Ship lets you sort by price or delivery time.
-
Add extra services if needed, such as insurance or signature-related options when eligible. Adding shipping insurance through USPS is straightforward for Priority Mail and Priority Mail Express labels.
-
Add the label to your cart, pay for postage, and then print or save the label.
-
Drop the package off at a Post Office or schedule a free USPS Package Pickup if the shipment qualifies.
The advantage of Click-N-Ship is control. You can compare service options before buying, keep a history of labels, request refunds for eligible unused labels, and handle the whole process without waiting in line. For businesses managing multiple carriers, integrating USPS with multi-carrier software streamlines operations further and enables smarter carrier allocation decisions across your entire shipping volume.
Creating USPS Shipping Labels at the Post Office Counter
If you do not want to create the label online, you can still take your package to a USPS retail location and have the label created there. It works well when you want a clerk to confirm the package details, weigh the shipment, or help you choose the right service.
What Happens When You Create Labels In Person at USPS
-
Bring the sealed package and the full delivery address.
-
A USPS clerk weighs and measures the package if needed.
-
You choose the mailing service and any eligible extras.
-
USPS prints and applies the shipping label for you after payment is received.
It is the easiest route for occasional shippers, but it usually means paying retail counter rates rather than the lower commercial rates available online. Understanding the cost difference can significantly impact your overall shipping cost management. Businesses looking to reduce logistics costs over time should make online label creation a default part of their workflow rather than the exception.
Sources: | |
How to Print a USPS Shipping Label at Home, at the Office, or Without a Printer
Printing your own USPS shipping label saves time and gives you more control over how the label is placed and presented. USPS supports home printing, office printing, and no-printer alternatives, so the actual print step is flexible. What matters most is that the label is clear, flat, and fully scannable.
What Printers Work Best for Printing USPS Shipping Labels at Home?
You can print USPS shipping labels with:
- Inkjet printers
- Laser printers
- Thermal label printers for higher-volume workflows
Many ecommerce businesses invest in thermal printers as part of their automated shipping systems to handle high-volume label printing efficiently. If you are also managing fulfillment through a platform, reviewing ecommerce shipping software options can help you automate label generation and carrier selection at the same time.
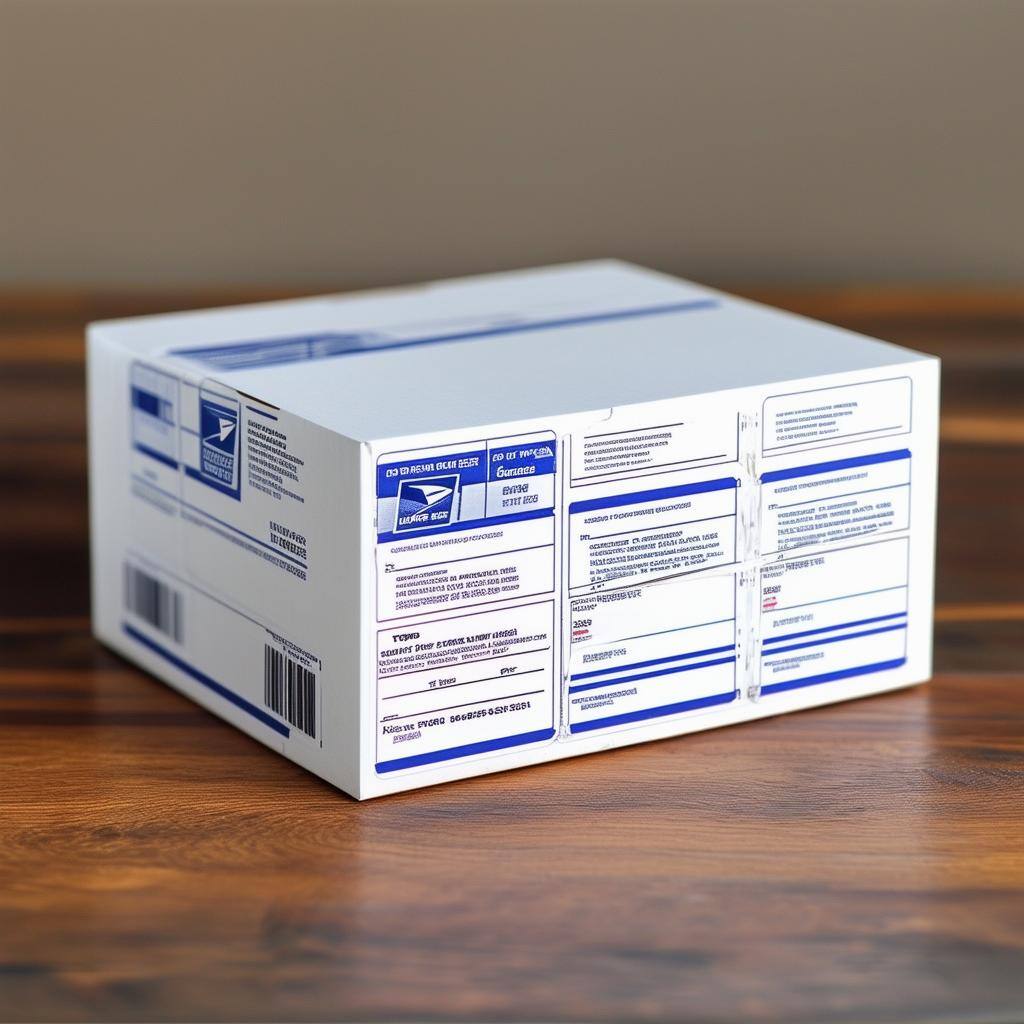
USPS Shipping Label Sizes: 4x6 vs 8.5x11 and Which Format to Use
The most common shipping label format is 4 x 6 inches, especially for thermal printers, as it is the standard format used by most shipping operations. If you are printing with a regular home or office printer, USPS labels are also commonly printed on standard 8.5 x 11-inch paper and then cut or folded as needed without obscuring the barcode.
A few printing rules matter:
-
Print the label clearly so the text and barcode are sharp.
-
Keep the label flat on the largest side of the package.
-
Do not let the barcode wrap over an edge or corner.
-
Do not tape over the barcode in a way that creates glare, wrinkles, or scan interference.
How to Attach USPS Shipping Labels Correctly to Packages to Avoid Scanning Problems
Once the label is printed, attach it to the largest flat surface of the package. Make sure it is smooth, secure, and fully visible. If you are using plain paper, tape the edges down well, but avoid placing glossy tape directly across the barcode, as it can distort scanning.
The label step is where many avoidable problems begin. A perfectly purchased label can still cause trouble if the barcode is creased, half-covered, or stuck over a box seam. Learning how to print shipping labels for small business correctly prevents most common acceptance issues. Barcoding best practices apply here too — the same standards that govern warehouse scanning apply to shipping label readability in transit.
How to Get a USPS Shipping Label Without a Printer Using Label Broker or Label Delivery Service
Not having a printer is no longer a serious obstacle. USPS offers two official ways around that problem: Label Broker and Label Delivery Service. Label Broker is the faster option for most people because it lets you create the label online and have USPS print it for you using a QR code or Label Broker ID.
With USPS Label Broker, you buy postage online, save the Label Broker ID or on your phone, take your sealed package to a participating USPS location, and have a retail associate or self-service kiosk print the label there. USPS says the label printing itself is handled at the location once the code is scanned.
USPS also offers Label Delivery Service, where USPS prints the label and physically delivers it to your address for an extra fee of $1.65 per label. That option is slower than Label Broker, but it is useful if you want to create the label online and still avoid printing it yourself.
Sources: | |
How to Save Money on USPS Shipping Labels: Commercial Rates, Flat Rate, and Cost Reduction Tips
The easiest way to save money on USPS shipping labels is to avoid buying them only at the retail counter. USPS states that Click-N-Ship gives users access to lower Commercial Rates, which means online label creation is often cheaper than walking into the Post Office and paying the posted retail rate.
Practical Ways to Reduce Your USPS Shipping Label Costs in 2026
-
Print labels online instead of paying at the counter to access USPS commercial pricing.
-
Compare Ground Advantage, Priority Mail, and Priority Mail Express before buying, because the fastest option is not always the most sensible one. The USPS shipping calculator helps you estimate costs across services before committing.
-
Use Flat Rate packaging when it makes sense, especially for dense packages going long distances.
-
Request refunds for unused eligible labels instead of letting postage go to waste. USPS allows refund requests for eligible unused labels created within the past 30 days of the print date.
-
Use free Package Pickup when eligible so you do not spend time or money making unnecessary Post Office runs.
Saving on USPS shipping labels is usually about process, not tricks. Accurate package data, online label creation, and service comparison do more for shipping costs than most people expect. Businesses managing high volumes can further optimize costs through carrier allocation strategies and ecommerce shipping software integrations. Exploring a shipping aggregator is another option for businesses that want to access discounted rates across multiple carriers from a single platform.
Common USPS Shipping Label Mistakes That Cause Delays, Returns, and Postage Adjustments
Most USPS label problems are not complicated. They are small, avoidable mistakes that interfere with routing, pricing, or scanning. The good news is that they are easy to prevent if you slow down for a minute before printing.
Address Errors and Incomplete Information That Cause USPS Delivery Failures
Using an incomplete or incorrect address: A missing apartment number or a wrong ZIP Code can misroute the package or cause an avoidable delay.
How Wrong Package Weight or Dimensions Trigger USPS Postage Adjustments
Entering the wrong weight or dimensions: Incorrect package details can trigger postage adjustments or service mismatch issues. Understanding dimensional weight and accurate measurements prevents unexpected surcharges.
Choosing the Wrong USPS Packaging for Your Selected Shipping Service
Choosing the wrong packaging-service combination: USPS-branded packaging must be used with the service for which it is designed, especially Flat Rate packaging.
Barcode Scanning Issues Caused by Tape, Poor Placement, and Low Print Quality
Covering the barcode badly: Tape, glare, creases, or folds over the barcode can make the label hard to scan.
Placing the label over a seam, edge, or corner: That makes peeling and scan issues much more likely.
Printing a low-quality label: Smudged ink or poor contrast can cause acceptance and transit issues.
The best defense is simple: verify the address, verify the package details, preview the label, and make sure the final print is clean and flat. That small pause prevents most of the headaches people later blame on the carrier. These mistakes contribute to broader delivery exceptions that slow down shipments and increase the likelihood of a pre-shipment rejection at the counter.
How USPS Shipping Labels Compare to FedEx and UPS Labels: Cost, Speed, and Use Cases
Understanding how USPS labels compare to other carriers helps you make informed decisions about which carrier to use for different shipments. Each carrier has strengths for specific use cases.
While USPS excels at residential delivery and offers competitive pricing for lighter packages, FedEx shipping labels and UPS shipping labels may offer better rates for heavier commercial shipments. The FedEx vs USPS vs UPS comparison shows how each carrier performs across different shipping scenarios. If you regularly ship with UPS as well, understanding how to create and print UPS shipping labels follows a similar workflow to the Click-N-Ship process covered here.
For businesses shipping at scale, implementing best shipping carriers selection strategies through carrier allocation can optimize both cost and delivery performance across multiple carriers simultaneously. Using multi-carrier shipping software allows you to compare USPS, FedEx, and UPS rates in real time and assign each shipment to the most cost-effective option automatically.
Methodology and Editorial Note
This article was researched using current USPS service pages, the USPS Click-N-Ship user guide, USPS Label Broker documentation, USPS refund guidance, and USPS international shipping instructions. The goal was to explain the real 2026 USPS label workflow using current service names and current USPS tools, not older shipping terminology or third-party shortcuts. Where helpful, I translated USPS process language into plain operational guidance, but I did not override the official USPS rules on label creation, refunds, service eligibility, or label printing alternatives.
Final Checklist Before You Ship Your USPS Package: Address, Label, Packaging, and Placement
Creating USPS shipping labels is not difficult once you understand the flow. The real skill is getting the details right the first time: correct address, correct package information, the right service, a clean printed label, and proper placement on the box or envelope. Do that consistently, and USPS shipping labels stop feeling like an admin task and start working the way they should—fast, clean, and with fewer delivery problems.
For businesses handling returns, understanding how to create UPS return labels and prepaid shipping labels alongside USPS options gives you flexibility in your post-purchase experience strategy. Pairing this with a strong shipping policy ensures customers always know what to expect when it comes to delivery timelines, return procedures, and label requirements.
Frequently Asked Questions About USPS Shipping Labels
How do I create a USPS shipping label online without going to the Post Office?
You can create USPS shipping labels online through USPS Click-N-Ship by logging in to your USPS account, entering the sender and recipient addresses, choosing the service, adding package weight and dimensions, paying for postage, and printing the label. Click-N-Ship also lets you compare options and schedule pickup for eligible shipments.
Can I print a USPS shipping label without owning a printer?
Yes. USPS Label Broker lets you create the label online and then bring the QR code or Label Broker ID to a participating USPS location, where the label can be printed for you. USPS also offers a Label Delivery Service that mails you a printed label for an extra fee.
What is the standard label size for USPS shipping labels — 4x6 or 8.5x11?
The most common USPS shipping label size is 4 x 6 inches, especially for thermal printers, but labels can also be printed on standard 8.5 x 11-inch paper with a home or office printer. Whatever format you use, the label must lie flat, and the barcode must remain fully visible and unobstructed.
Do USPS shipping labels expire, and can I get a refund for unused labels?
Yes. Unused Click-N-Ship labels are eligible for refunds only if they have not been scanned and were created within the past 30 days of the label print date. If you do not use the label, the postage is not automatically refunded, so you need to request the refund through your USPS account.
How do I get commercial pricing on USPS labels instead of paying retail counter rates?
Commercial pricing is available when you create USPS shipping labels online through Click-N-Ship and certain approved third-party shipping tools rather than buying postage only at the counter. USPS explicitly says Click-N-Ship gives users access to lower Commercial Rates, which is why online label creation usually beats retail counter pricing.
What are the most common mistakes that cause USPS shipping label delivery problems?
The most common USPS label mistakes are incorrect or incomplete addresses, wrong weight or dimensions, using the wrong USPS packaging for the selected service, printing labels poorly, covering the barcode with tape, and placing the label over a seam or corner. These errors can delay routing, create postage adjustments, or make the package harder to scan.
The Post-Purchase Experience Platform